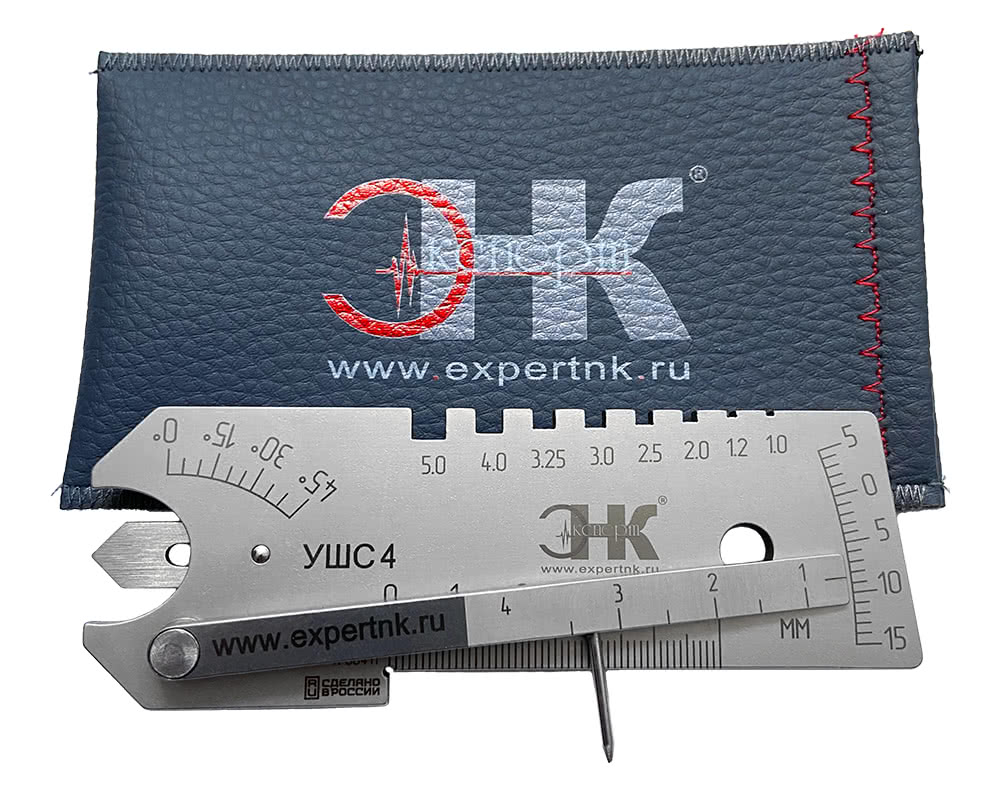
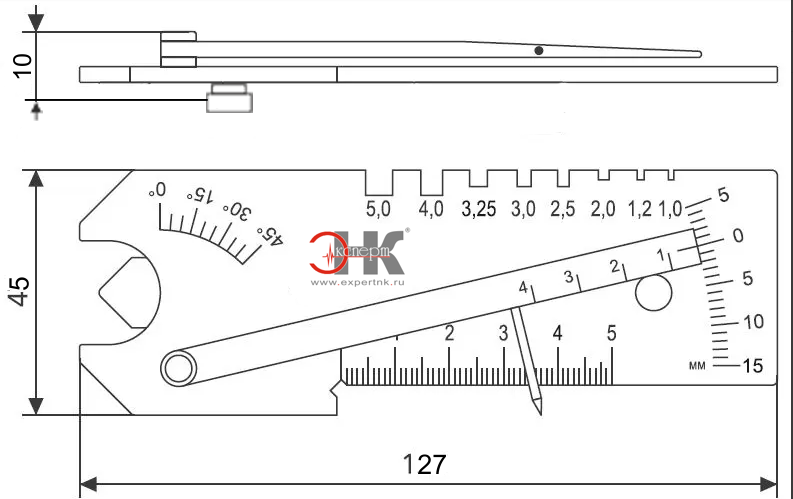
UShS-4 of our own production is made of stainless steel, and at the choice of the customer can be supplied in two types: with and without calibration.
Purpose:
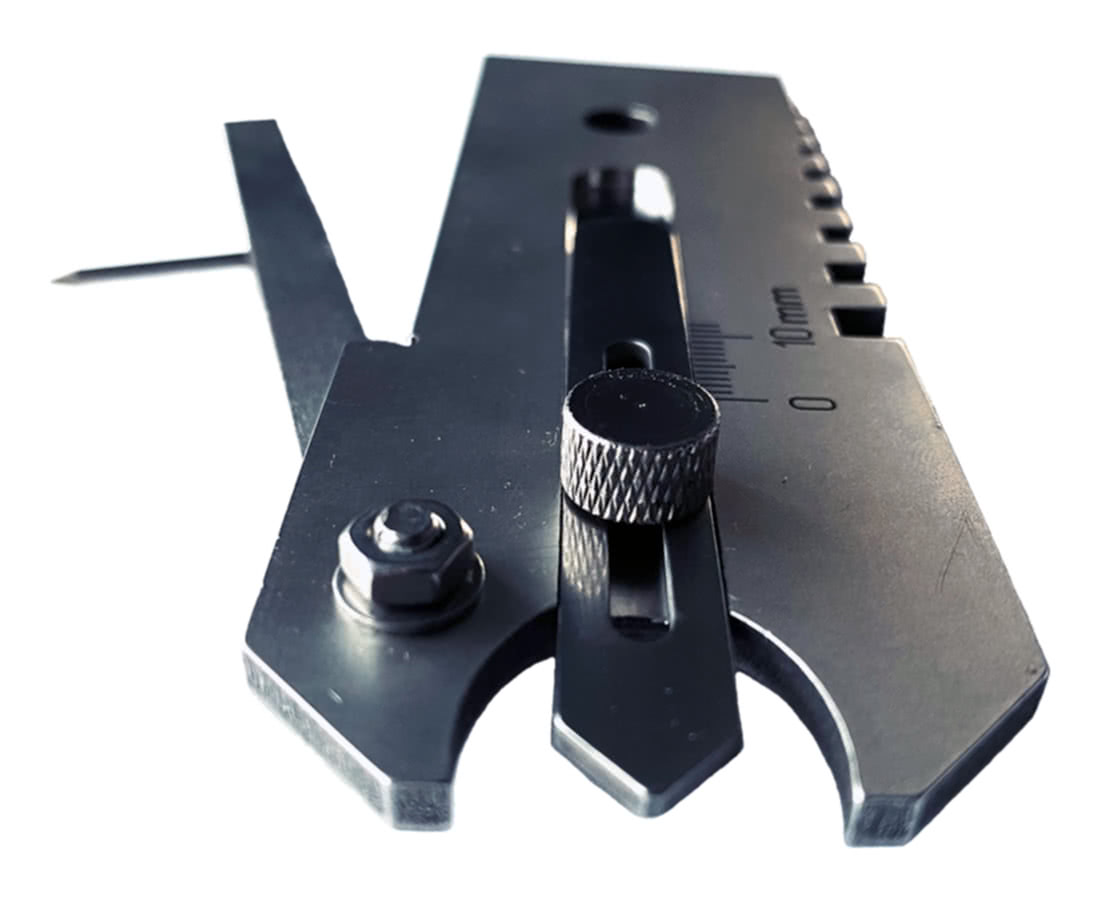
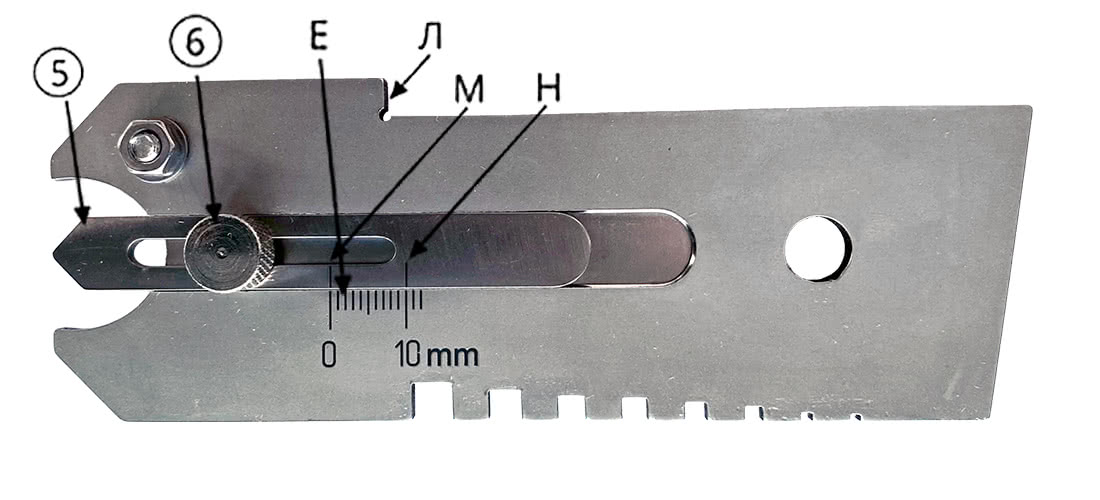
Universal welder's template UShS-4 is the same UShS-3, only on the reverse side in the body of the template there is an additional slider that completely replaces the functions of the Usherov-Marshak template (WG3), which allows you to measure the actual thickness of the fillet weld. In other respects, like UShS-3, it allows you to control the depth of shells, nicks, excess edges, the depth of cutting the joint to the root layer, the height of the weld reinforcement, control the gap, blunt the seam, the width of the weld, the bevel angles of the edges, as well as the diameters of the electrodes. In combination with the KMS-3-16 cathetomer, the UShS-4 template provides control of all the main parameters of welds and workpieces.
Distinctive features:
In UShS-4 of our production, the rear slider is recessed directly inside the body of the template itself, which, compared to competitors, gives a significant advantage in ease of measurement, compactness and overall weight of the template.
EAEU HS code: 9017 30
Weight: 170 g. Material: stainless steel.
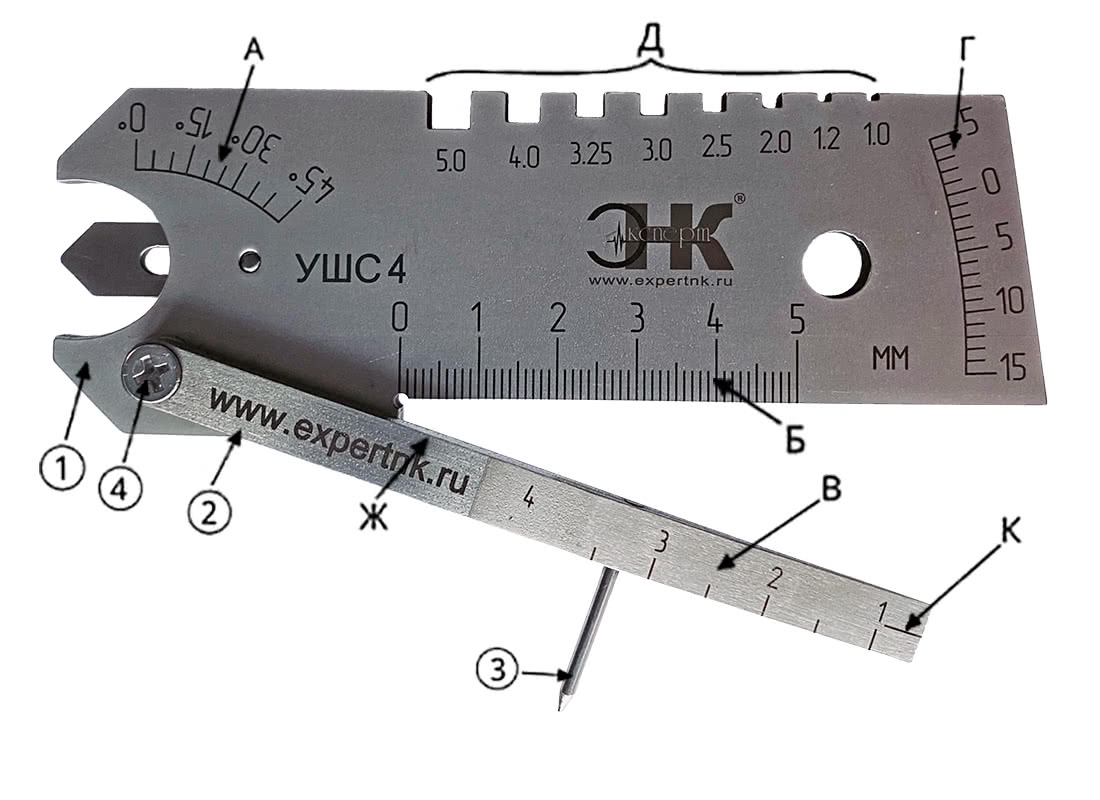
Scales
| Scale |
Unit |
Scale range |
Scale division |
Measurement error |
| А |
° |
0 - 45 |
5,0 |
±2,00 |
| Б |
mm |
0 - 10,0
10,0 - 50,0 |
1,0 |
±0,15 |
| В |
mm |
1,0 - 4,0 |
0,5 |
±0,20 |
| Г |
mm |
5,0 - 0 - 10,0
10,0 - 15,0 |
1,0 |
±0,20 |
| Д |
mm |
1,0; 1,2; 2,0; 2,5;
3,0; 3,25; 4,0; 5,0 |
- |
±0,10 |
| Е |
mm |
0 - 12,0 |
1,0 |
±0,20 |
Controlled parameters
| Parameter |
Scale |
Measurement range |
Scale division |
Measurement error |
| Preparation for welding |
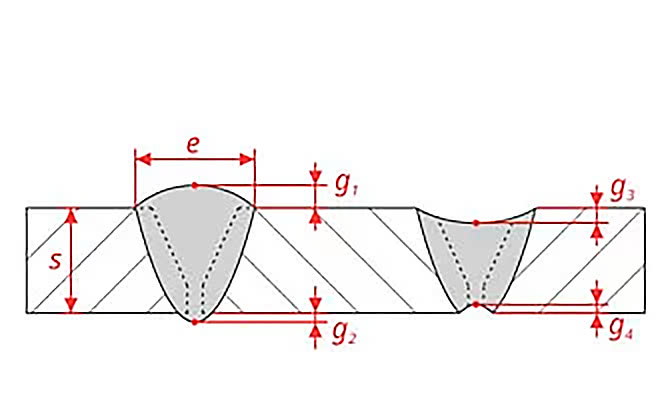
part thickness (s), mm |
Б |
0 - 10,0
10,0 - 50,0 |
1,0 |
±0,15 |
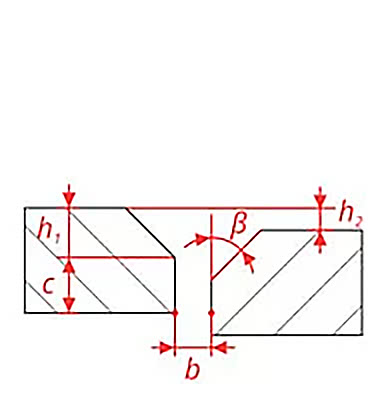
| blunting of the edge (c), mm |
| clearance between parts (b), mm |
В |
1,0 - 4,0 |
0,5 |
±0,20 |
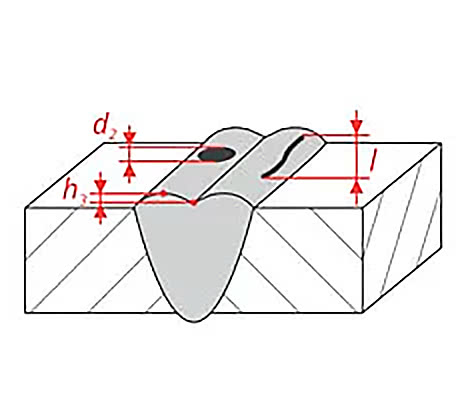
| bevel depth (h1), mm |
Г |
0 - 10,0
10,0 - 50,0 |
1,0 |
±0,20 |
| edge offset (h2), mm, relative to the top part |
| (h2) relative to the bottom part |
0 - 5,0 |
| bevel angle (β), ° |
А |
0 - 45 |
5,0 |
±2,00 |
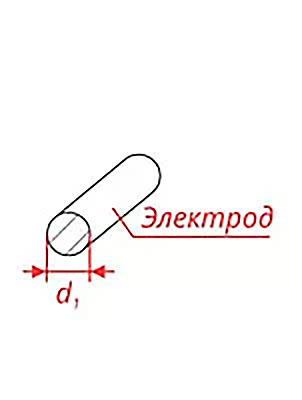
| diameter of electrodes and welding wire (d1) |
Д |
1,0; 1,2; 2,0;
2,5; 3,0; 3,25;
4,0; 5,0 |
- |
+0,10 |
| Butt seam |
bulge of the butt (g1) and its root (g2), mm |
Г
Е |
0 - 5,0
0 - 12,0 |
1,0 |
±0,20 |
| concavity of the butt (g3) and its root (g4), mm |
Г
Е |
0 - 10,0
10,0 - 50,0 |
| 0 - 12,0 |
| joint width (е), mm |
Б |
0 - 10,0
10,0-50,0 |
1,0 |
±0,15 |
| Fillet weld |
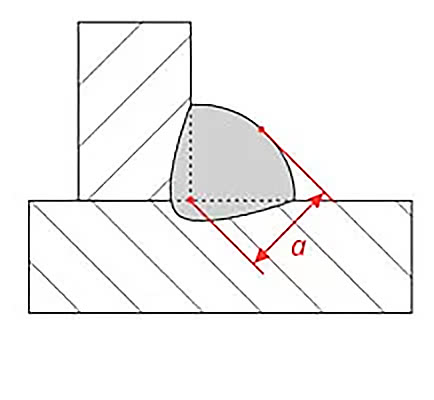
actual fillet weld thickness (a), mm |
Е |
0 - 12,0 |
1,0 |
±0,20 |
| Defects |
defect length (l), mm |
Б |
0 - 10,0
10,0 - 50,0 |
1,0 |
±0,15 |
| the depth of the defect, scaling, sinking between the rollers (h3), mm |
Г |
0 - 5,0 |
1,0 |
±0,20 |
USHS-4 without calibration
- template UShS-4 EXPERT NK;
- case;
- passport.
Code: 73S307
in stock
BuyUSHS-4 with calibration
- template UShS-4 EXPERT NK;
- case;
- passport.
Code: 73S308
in stock
Buy

